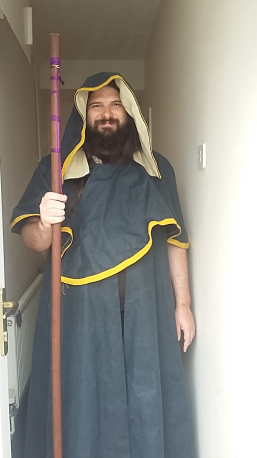
Viking Coat
Draped to a brief. Waxed cotton canvas, linen. July 2020The viking coat is a dark ages fantasy garment, combining vikingesque shapes with contemporary coat tailoring and weather-hardy fabrics - perfect for rambling in the mountains and looking impressive in front of dragons. It was designed, drafted, and constructed by me as a pandemic project.
|
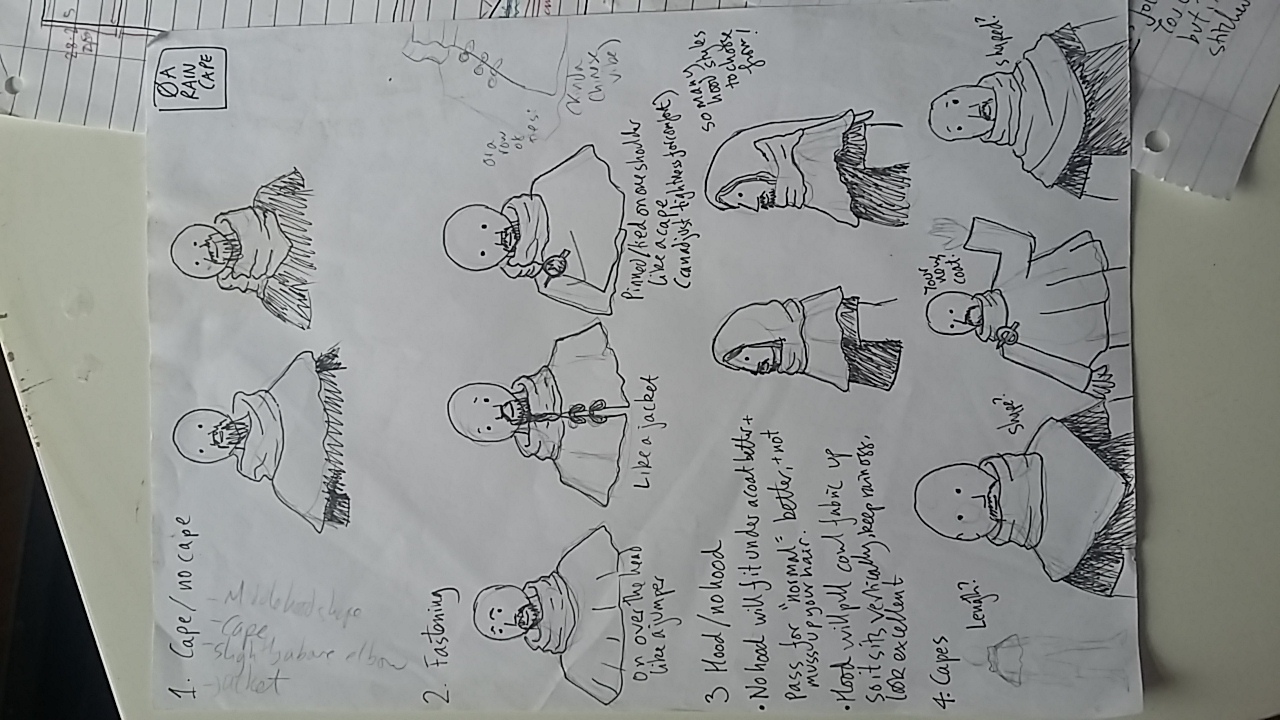
Sketch options in conversation with the client. I take copious written notes whenever I sew, so I can consolidate learning, understand what I did and why earlier in the process, keep track of measurements, complete similar tasks faster in future, and also look back at questions I had that I now know the answer to, or have since learned improved techniques for. The notes for the Viking Coat are currently 30 pages, and incorporate sketches taken from costumes in the client’s favourite films, pattern layouts and dimensions, descriptions of fit issues and the solutions I used, questions I need to follow up on, information about the fabric copied from the web, and written out step-by-step to-do lists to plan out my work day. |
|
|
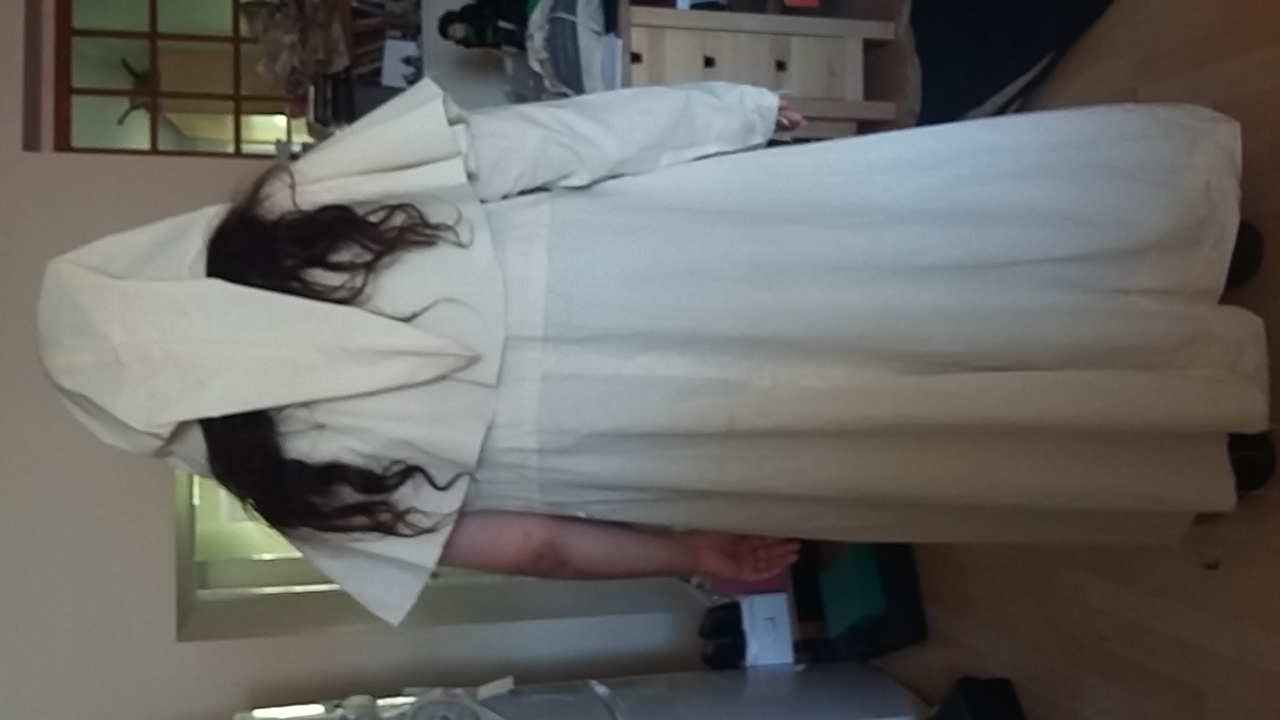
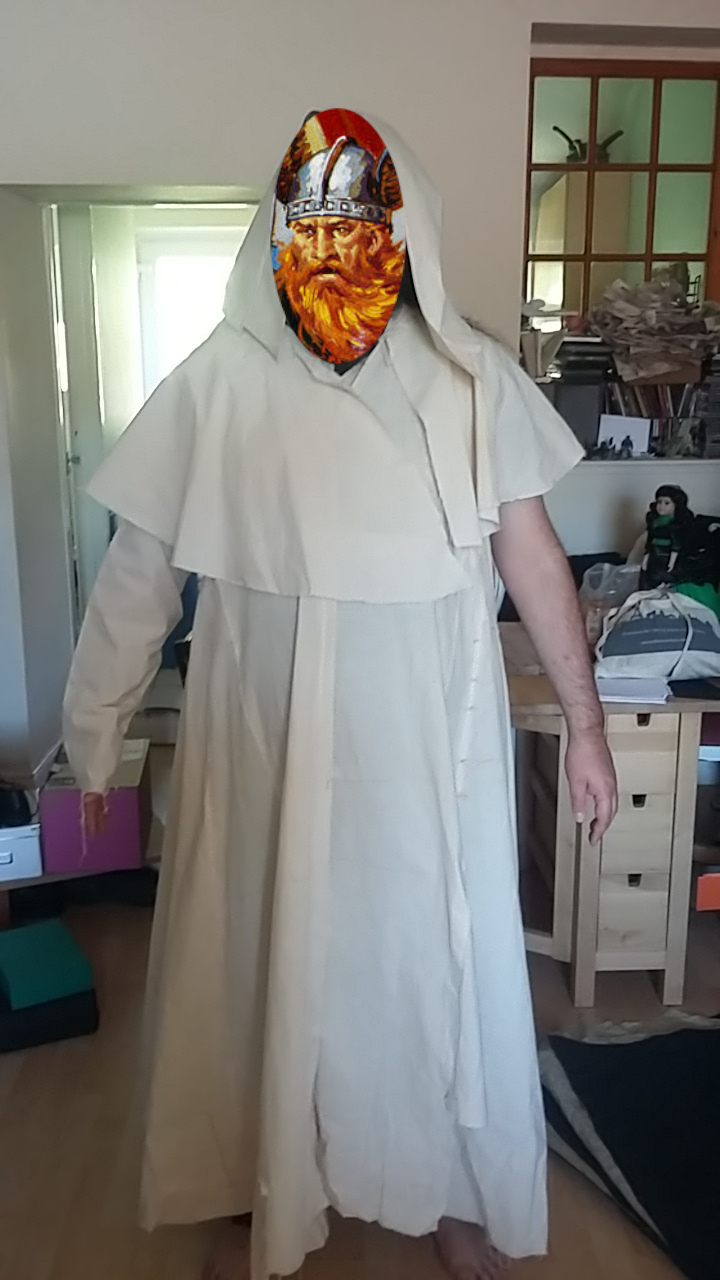
Calico sample. Design draped in calico and fitted on the client. Testing appearance with and without sleeves. |
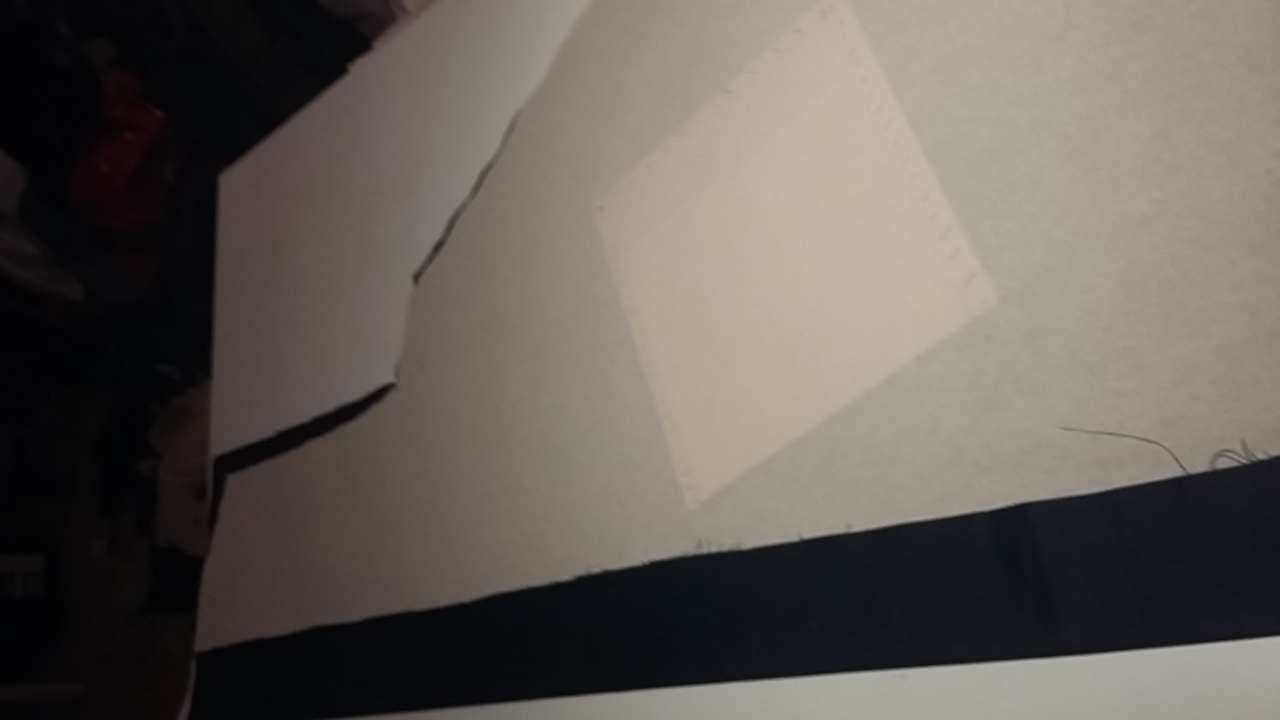
| Setting in the lining |
|
|
|
|
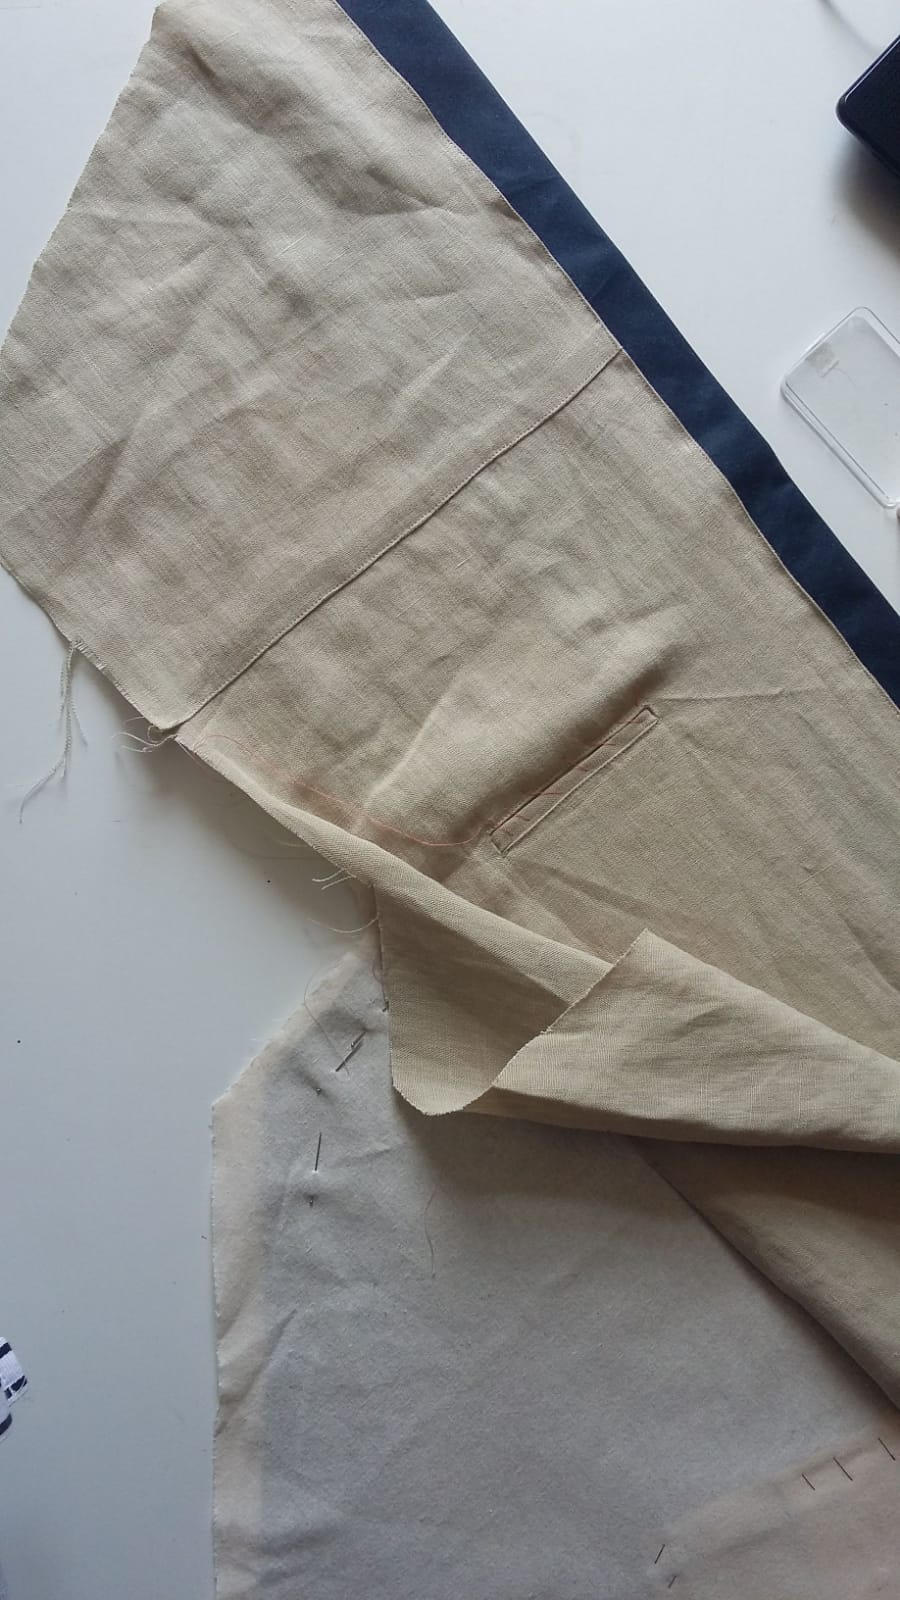
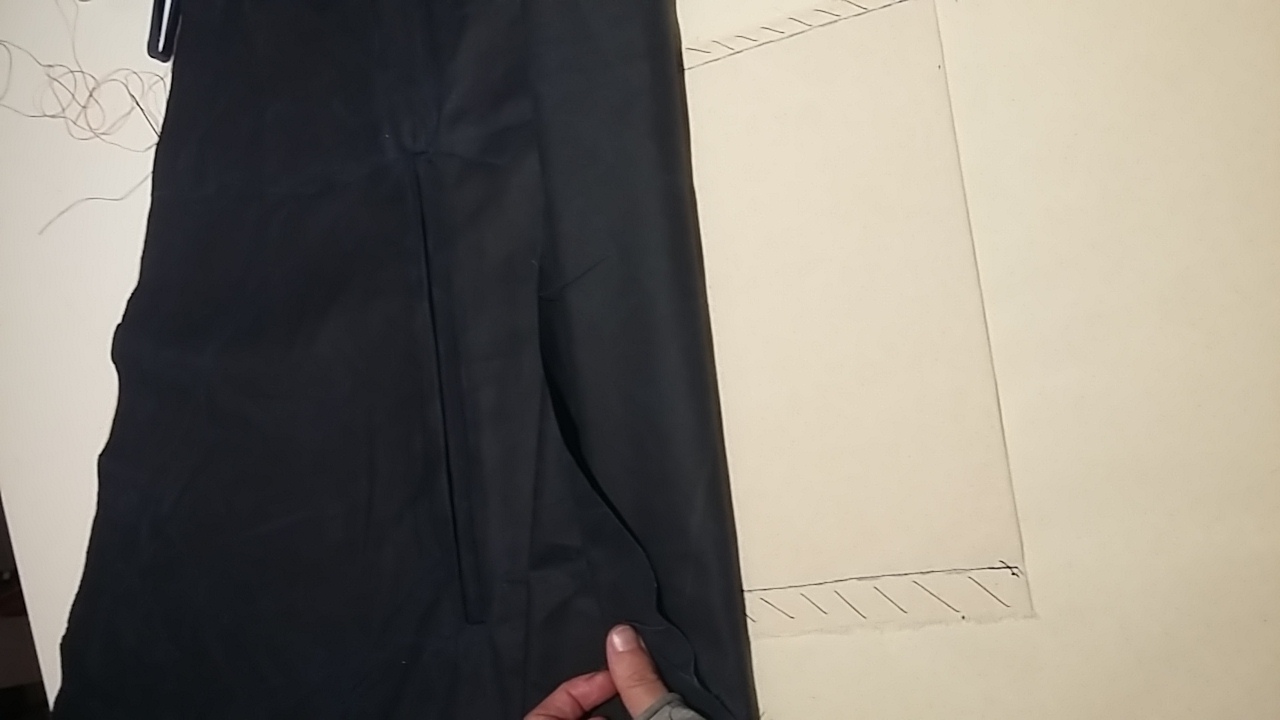
Fixing the pockets to the inner layer. Fold in the lining helps support pocket weight. |
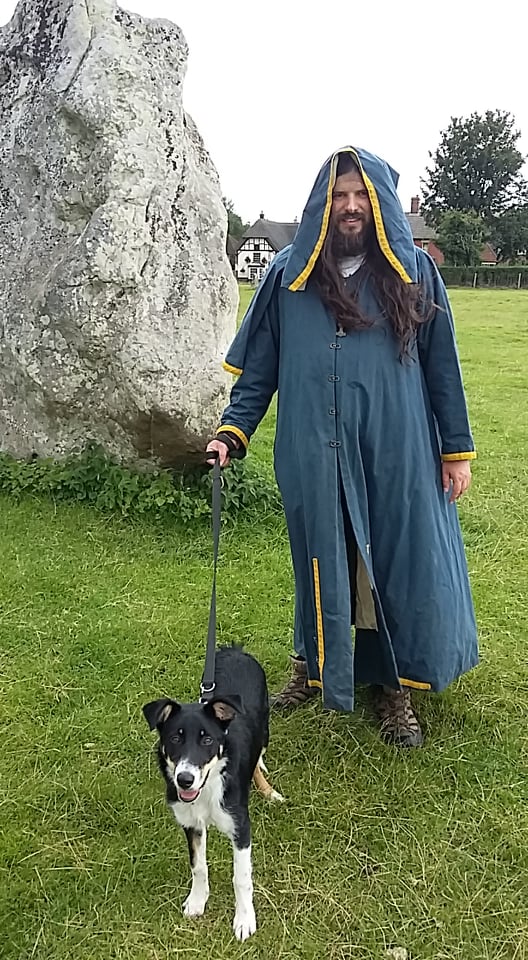
Finished!
|
|
|
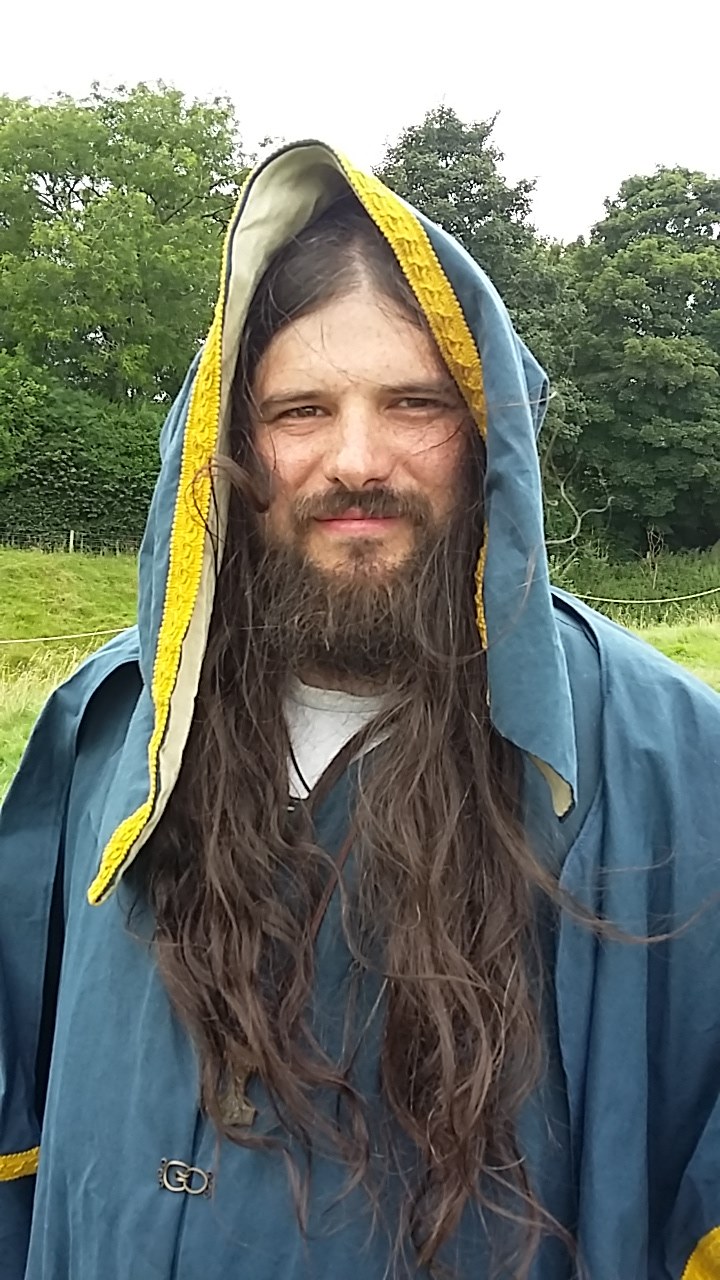
The cloak can be fully thrown back over the shoulders, and the hood is also attached only to the shoulders, to allow maximum freedom of movement and adjustment to the wearer. The stiffness of the fabric means elements tend to stay where they are “put” – so adjustments for motion, visibility, and maximum rain protection are all easy to accomplish, with the elements sewn on as minimally as possible.
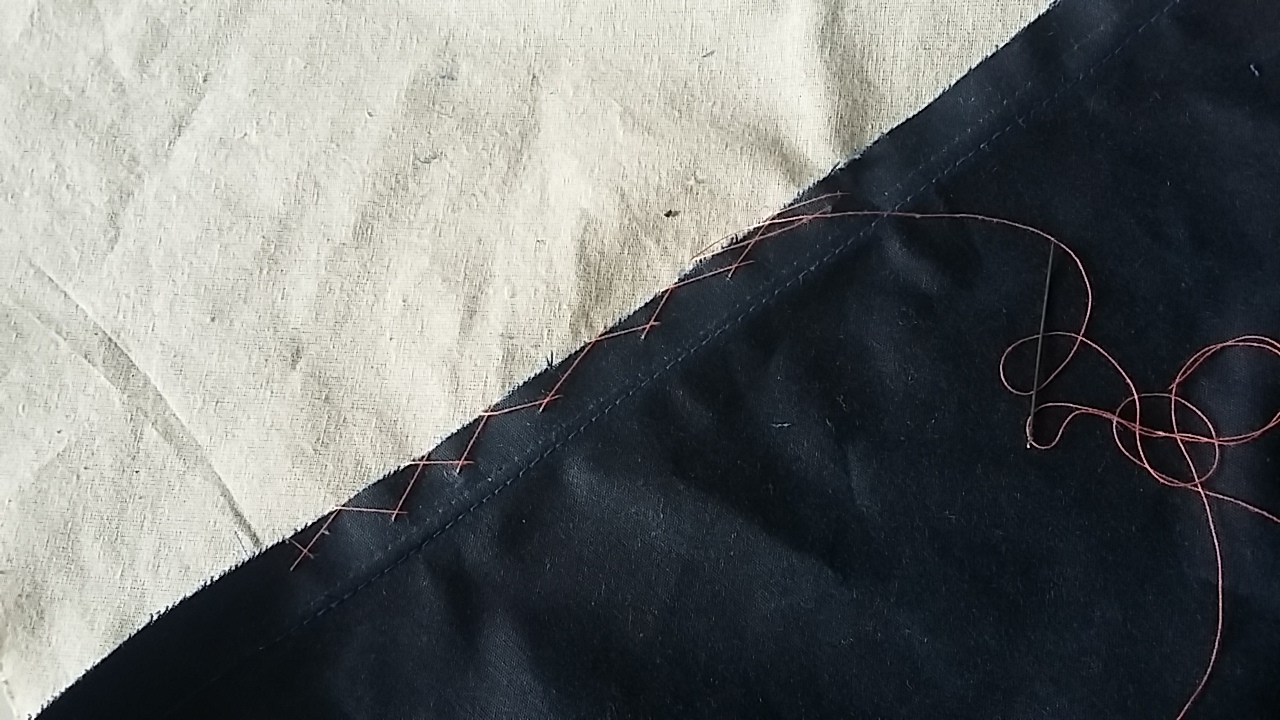
Hood lining is hand-stitched in for the neatest result. Hood and lining are both cut on the bias, so that the outer rim of the hood naturally falls into elegant curves – when cut on the grain, they tend to look stiff and awkward.
There are definitely things I would have liked to have done differently, but my client is delighted, and that’s ultimately all that counts.
Next Steps
The coat may be waterproof, but this photographer is not, and there’s a downpour so I look forward to taking some properly atmospheric photographs in the woods soon.
Brass hook and eyes will attach the cape at the shoulder and the hood at the neck, as well as down the CF. Because the cloak was at a late stage decided that it would be tossed back over the shoulder, you can see the underside of the hem, so a second row of braid will be placed under there – probably by hand stitching, to avoid producing a messy outcome on the topside. There will also be more braid tested on the hem of the garments, and potentially the pockets – which were designed to be unobtrusive. Even though it’s far more pleasant as a sewer to machine-stitch these in place on flat pieces, as a designer I’m happier hand-sewing them to finished garments to check their visual impact throughout the process.
I anticipated that this fabric may fit differently from the calico toile, but was still astonished by how much smaller it worked up than the calico – I assumed it would be a matter of a few centimeters, but it’s a pretty dramatic level of shrinking. One of my big barriers to working in costume at present is a lack of rounded fabric knowledge. I keep a journal of how to work with fabrics, updating it for every new one I experiment with, but in future I look forward to more opportunities to buy and work with a range of “real” fabrics to expand my knowledge. Fortunately, on this project, the problem is very salvageable: the coat was already designed to be large, and I can easily add an underlap or placket to the CF to allow it to be fastened neatly. Having recognised this problem with the coat body, I made the hood pattern bigger compared to the toile, and am happy with the result.